Block Water Drainage From a Neighbor's Yard​

How to Block Water Drainage From a Neighbor’s Yard​

Water from an adjacent property that runs onto yours is damaging to foundation, landscaping, and outdoor living areas. Thankfully, this situation can easily be managed while one retains a good relationship with neighbors along with one’s defense of their property investment. Neighbor water drainage solutions can help resolve these conflicts effectively.

Water Drainage Problems: Understanding the Issue 

First in resolving a flow problem is determining exactly what is occurring and why. The natural flow of water is down a path of least resistance, yet humans’ alterations with new construction, landscape changes, or errors in grading can make water flow onto a neighbor’s property. 

Walk along your property line both before a heavy rainstorm and afterward to see how water is moving. Note where water is coming onto your yard, how much volume you’re working with, and what kind of damage it’s doing. Pooling water, erosion, soft spots that never seem to harden, or water inside your basement or crawl space are common signs. 

Keep a record with photographs and videography with time stamps and weather conditions. This record will be helpful if you’re bringing up the matter with your neighbor or if you’re involving authorities in the future. 

Legal Considerations for Water Drainage Rights 

Drainage laws for properties vary immensely from place to place, but most jurisdictions adhere to “natural flow” laws or “reasonable use” laws. In natural flow laws, property owners will never be allowed to make any changes to neighbors’ flow patterns. In reasonable use laws, changes become permitted if they do not unreasonably harm neighbors’ properties. 

Obtain a listing from your municipal building office of permits that must be obtained and laws for draining. There will usually be municipal codes for stormwater redirection that mandate permits for draining changes. There may also be a neighbor mediation service available in some areas. 

Knowing what you’re legally entitled to enables you to address the issue confidently and enables any solutions that you pursue to be legally enforceable long-term. If you’re wondering how to block water drainage from a neighbor’s yard, knowing local codes and rights is essential. 

First Steps: Communication and Documenting 

Prior to seeking action from an authority, attempt to address personally with your neighbor. Perhaps they don’t grasp that changes they made to their property created a nuisance, and most drain disputes can be corrected with neighborly discussion. 

Present documentation in a clear fashion and suggest mutually-focused solutions. You may be able to divide the cost of installing effective drains, or they may re-do their landscaping so they will be able to direct water more effectively. Create written records of all discussions, dates included, along with topics discussed and agreed upon. 

If that isn’t effective, prepare a certified letter stating the problem with a request for action promptly. This creates a formal record that a good faith effort was made toward resolving matters amicably. 

Professional Remedies: When a Specialist Should Be Chosen 

When neighbor communication fails or the drainage problem is complex, professional intervention becomes necessary. A drainage contractor or civil engineer can assess the situation and recommend solutions like French drains, retaining walls, or regrading. 

Good solutions for draining effectively consist of installing catch basins near property lines, installing swales to rotate water flow orientations, or installing permeable barriers that slow water flow. The most effective solution will be based on your terrain, ground conditions, and area permits. 

If your neighbor is uncooperative and nothing gets done despite that, you might need to escalate the issue with your homeowner’s insurance or a property lawyer. A majority of policies provide protection for damages from external forces for water damages, and litigation might be needed for recurrent damaging issues with a drain.

All in all, considering yard drainage services in OKC could be an effective way to resolve these issues with professional help. 

Securing Your Property and Relationships 

Drain problems don’t necessarily have to become boundary arguments. Learn about rights, take note of details diligently, and talk potential solutions professionally so that you keep what is yours without being a troublesome neighbor. 

Start with documentation and notification, escalate to professional repairs if needed, and never forget that investment in proper draining pays off for saving your property value in the long term. The idea is acting early when water damage isn’t critical and expensive to repair.

Read More

How to Install a Drainage Pipe in a Yard

Puddling after a heavy rain can turn your lovely lawn into a mushy disaster. Not only are puddles unattractive, but poor drainage can also ruin your foundation, kill plants and grass, and provide a breeding ground for mosquitoes. A drainage pipe system provides a great way to divert excess water away from your home. Yard drainage solutions are essential for maintaining a healthy and functional outdoor space

A properly planned drainage system safeguards your investment in landscaping and efficiently averts expensive water damage to your residence. 

Planning Your Drainage System 

Evaluating Drainage Problems in Your Yard 

Begin by paying attention to water flow and patterns both during and following rainstorms. Take a walk around your property to notice where water accumulates, the direction in which it naturally flows, and where it eventually drains. Areas of concern usually consist of low areas, regions close to downspouts, and places where water remains for over 24 hours following rain. 

To ensure yard drainage pipe installation is successful, measure your yard slope with a level or phone app. To drain properly, there should be at least a 1% slope (one inch drop over 100 inches length) to allow the water to flow properly through the pipe system. 

Choosing the Right Drainage Pipe 

The most typical choices are perforated PVC pipe, corrugated plastic pipe, and solid PVC pipe. Perforated pipes are ideal for French drains and groundwater collection, whereas solid pipes are best for transporting large amounts of water from one point to another rapidly. 

Select pipe diameter according to your drainage requirements. Four-inch pipe addresses most home uses, but six-inch pipe accommodates those areas with high water flow or larger lots. Knowing how to install drainage pipe in a yard properly is crucial to ensuring the system works efficiently – thankfully, the experts will have all the knowledge you need. 

Planning Your Layout 

Professionals will chart your drainage path from the issue area to the discharge point. The discharge point should be at least 10 feet away from your foundation and preferably slope to a lower grade such as a street, ditch, or natural watercourse. 

The experts will then design your trenches to miss landscaping features that you already have and want to keep, and think about how the installation will impact foot traffic patterns in your yard. When dealing with yard drainage in Oklahoma City, account for the local climate and soil conditions, which can affect the flow and effectiveness of your system. 

How Professionals Install Drainage Pipes 

Professional installation starts with careful excavation. Contractors excavate trenches 18 to 24 inches deep and about six inches wider than the diameter of the pipe. They keep a uniform slope along the trench using laser levels or string lines. 

The bottom of the trench is given a two-inch covering of graded gravel, which offers a firm foundation and enhances drainage around the pipe. The drainage pipe is laid carefully on this bed of gravel by professionals, making sure that all connections are tight, and the slope is uniform. 

Pipe installation is done by wrapping perforated pipes with landscape fabric to keep soil out but allow water to enter. Solid pipes are joined together with proper fittings and primer/cement for lasting joints. 

Backfilling is done with certain materials and methods. Contractors encase the pipe in graded gravel six inches above the pipe, followed by a layer of landscape fabric, and then backfill with soil. This keeps the fine particles from eventually clogging up the drainage system. 

Lastly, professionals place appropriate outlet features such as pop-up emitters or drainage grates in the point of discharge. These structures resist erosion and allow water to safely exit the system. Installing a drain pipe in a yard with the help of professionals ensures these steps are done correctly and efficiently. 

Improve Your Property with Adequate Drainage 

Drain pipe installation gets rid of standing water issues while saving your property value and efficiency. This investment saves you from costly foundation repairs, rescues dying lawns and gardens, and makes your outdoor area a better place to enjoy with your family. 

Look at hiring drainage experts for complicated installations or homes with difficult topography. Their know-how guarantees your system operates efficiently for years and prevents costly errors that would demand pricey repairs.

Read More
Clean a Concrete Patio

How to Clean a Concrete Patio

A concrete patio offers a durable surface for outdoor areas. However, as it has a porous surface, it attracts grime and dirt over time. It may also show discoloration signs if you don’t treat the surface properly. So, which is the best way to clean a concrete patio? Find a brief maintenance guide below and restore your patio’s original look.

Remove Furniture From the Patio

Remove outdoor furniture from your concrete patio. Planters and other items should also be away from the work area. While cleaning the concrete surface, exposure of metal furniture to moisture will cause rust. So, you should relocate them to a different place. 

Sweep the Loose Dirt Away

Using a broom, you can dislodge loose debris from your concrete patio. This step will make the cleaning task easier. You can reach stubborn stains and clean the concrete surface.

To remove dried mulch and compact dirt, use an abrasive sponge.

Treat Stains on Your Concrete Patios

Cleaning a concrete patio is not just about removing dirt from the surface. You can use a pressure washer or a garden hose to remove mildew and water stains. Some people use a solution of water and bleach for stain removal. 

Wear protective gear and scrub the surface with a brush. Then, rinse the surface with clean water. If your concrete patio has grease stains, sprinkle baking soda to remove them. After scrubbing the surface gently, wash the solution away. However, for old and stubborn stains, you need to use a degreaser.

Some people are concerned about rust stains on the concrete surface. Spray white vinegar on the surface and leave it for an hour. Brush the surface and rinse it with water.

Other Substances for Cleaning Your Patio

Muriatic Acid

As muriatic acid has a corrosive nature, it effectively dissolves stains and molds from concrete surfaces. This powerful chemical also removes rust stains from the surface.

However, you must be careful while using the toxic substance for your concrete patio. So, wear protective eye accessories and gloves when using muriatic acid.

It is safe to dilute the acid by mixing water. 10% of the solution should constitute muriatic acid. Thus, spray the solution on your concrete patio and brush it after a few minutes.

You can then add another mixture of water and ammonia to neutralize the acid.

Trisodium Phosphate

Trisodium phosphate is another concrete patio cleaner that needs to be mixed with water. It is best for deep cleaning your concrete surface. It will remove grease and dirt from the concrete patio.  

Direct contact with the eyes may cause irritation. You must use it cautiously while dealing with patio cleaning projects. Use a brush to scrub the chemical onto the stained part.

Summary

Concrete patios in Oklahoma City need regular cleaning to keep the surface dirt-free and stain-free. You can hire professionals to treat the outdoor area efficiently. They will also check if the concrete surface has damage. They repair the issues and clean the surface.

Read More
Concrete Curbing to Cure

How Long Does It Take for Concrete Curbing to Cure?

Homeowners considering landscape alternatives frequently fall in love with landscape edging made of concrete for good-looking lines and ultimate permanency. Although this popular material for edging offers great value in appearance, it is necessary to understand the curing timeline for planning your investment wisely. A proper curing process affects the strength and life of your investment, so it’s important not to fall into common traps. 

Understanding Concrete Curbing 

Concrete curbing provides for clear divisions between your walkways, flower beds, and lawn while bringing structured elegance to landscape construction. In contrast with temporary edging material, a long-term characteristic of concrete curbing withstands weather conditions while looking beautiful for decades with minimal maintenance. 

Installation consists of a combination of cement, sand, aggregate, and water that produce a moldable material formed with special equipment. Once formed, it triggers its change from a workable mixture to a hard, solid barrier during the concrete curing process

The Curing Procedure 

Concrete curing refers to a chemical reaction between cement paste along with water that will harden a slab with time. It starts hardening immediately once it’s placed, but goes through phases that dictate when it will be full strength. 

The Initial 24-48 Hours 

The process begins in the initial 24-48 hours. While it starts to set quickly, you mustn’t put any weight on the mix because it can significantly alter the structure and impact long-term results. 

Building Strength

Around a week or so from pouring time, the curbing has attained approximately 70 percent ultimate strength. This point permits some restricted landscaping work around the curbing, with permission for heavy equipment use and excessive force prohibited yet. 

Full Curing 

Full curing under normal conditions will be around 28 days. When this period is over, curbing reaches its full strength and can endure day-to-day landscape action, seasonal changes in weather, and general repairs without concern. How long does concrete curbing take to dry? Plan for 28 days to reach full strength. 

Factors Influencing Curing Time 

There are some material and condition factors that dictate how soon your curbing develops ultimate strength. 

Temperature and Meteorological Conditions 

Mild weather, between 70 and 80 degrees Fahrenheit, provides good curing conditions so that the reaction occurs smoothly. Low temperatures decrease curing time, while excessive weather accelerates it, with quick evaporation of moisture that damages the end product. 

Humid weather also becomes critical. Fairly humid weather cures well with suitable moisture content. Very low humidity might lead to watering more often to avoid cracking on top. 

Concrete Mix 

The special aggregate mix affects ultimate strength and curing speed. It tends to be quicker with more cement content, while some additives make it speed up or slow down, depending on what you require for a given task. 

Width and Thickness 

Thicker portions of curbing retain more humidity for a more extended time, accelerating fuller curing while lengthening time. Big installations may cure unevenly, with edges hardening sooner than the inside. 

Advantages of Carefully Cured Concrete Curbing 

Allowing ample time for curing allows for essential long-term protection for your landscape investment. 

Improved Durability 

Well-cured concrete curbing resists cracking, chipping, and weathering that otherwise would result from a rapid-cure process. This long-term strength equates to decades of good service with minimal repair. 

Weather Resistance 

Full cements produce a non-penetrable material with a hard surface that sheds water easily and resists freeze-thaw decay characteristic of cold climates. This weather protection guards your investment from fluctuation with the seasons. 

Maintained Look 

Curbs that are ideally cured maintains color evenness without becoming discolored or getting rugged due to defective curing. 

Scheduling for Project Timeline 

Knowing the concrete hardening time will prove useful when preparing for your landscaping task effectively. Budget for one whole month before arranging heavy landscaping activity in proximity to new curbing, and discuss time considerations with specialists for best results. 

Proper curing takes your concrete curb installation from a perimeter product to a durable piece of art that will improve your property’s value and appearance for decades to come. For homeowners seeking concrete curbs in Oklahoma City, careful planning and understanding the curing timeline will ensure long-lasting results.

Read More
Install a Concrete Patio

How Long Does It Take to Install a Concrete Patio?

Adding a concrete patio to your home is a smart investment. It not only enhances your outdoor living space but also adds lasting value and aesthetic appeal to your property. But one of the most common questions homeowners in Oklahoma City ask is: “How long does it take to install a concrete patio?”

The answer depends on several factors, including patio size, design complexity, weather, and curing time. At Bill’s Custom Concrete & Yard Drainage, we specialize in designing and installing high-quality concrete patios in OKC, and we’re here to break down the process step by step so you know what to expect.

Step 1: Planning and Permits

Before we even break ground, there’s some planning to do. This includes:

  • Finalizing the design and dimensions
  • Selecting finishes and textures
  • Confirming the location
  • Checking for utility lines
  • Acquiring necessary permits (if required)

For a basic patio, this phase can take just a day or two. If your project is more complex, such as a multi-level structure or includes special finishes, it may take a bit longer to finalize the plans.

Step 2: Site Preparation

Site prep is essential for a long-lasting concrete patio. This phase includes:

  • Excavating and leveling the area
  • Removing grass, soil, or old concrete
  • Installing forms to shape the patio
  • Laying a compacted gravel base for drainage and stability

This process usually takes 1 to 2 days, depending on the size of the patio and how much excavation is needed.

Step 3: Reinforcement and Framing

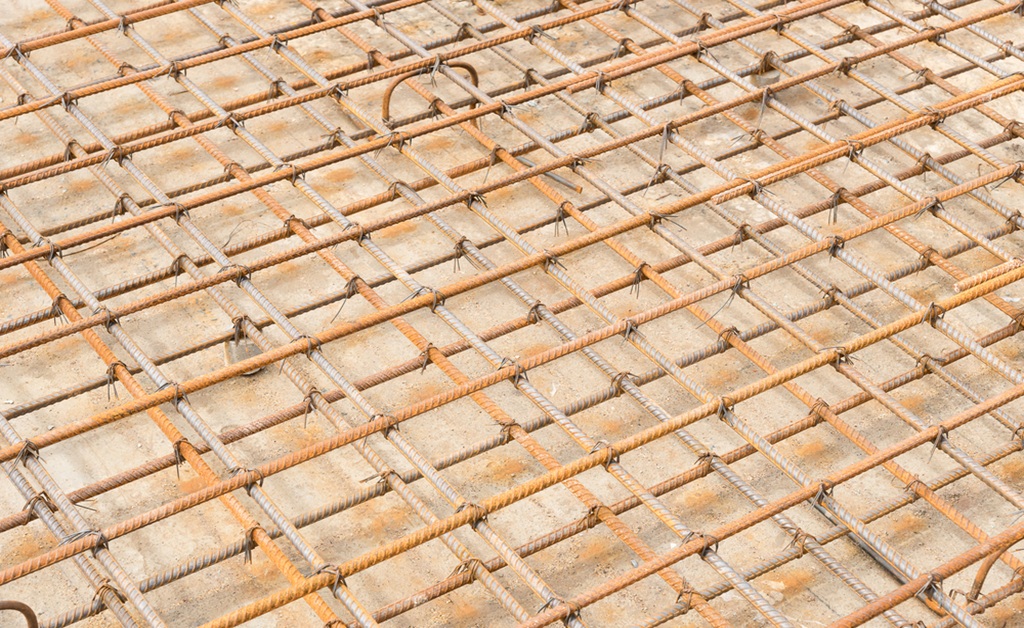
For added strength, most patios require reinforcement such as:

  • Steel rebar
  • Wire mesh
  • Expansion joints

Once the framework and reinforcements are set, we’re ready for the concrete pour. This step is usually completed within a single day.

Step 4: Pouring and Finishing Concrete

This is where the transformation begins. Our team pours the concrete into the prepared forms and works quickly to:

  • Spread and level the concrete
  • Apply your selected finish (broom, stamped, exposed aggregate, etc.)
  • Smooth the surface for visual appeal and safety
  • Add any decorative borders or textures

Depending on the weather and patio size, this step usually takes a full day from start to finish.

Step 5: Initial Curing

Once the concrete is poured and finished, it needs time to set and cure. During the first 24 to 48 hours:

  • Avoid foot traffic
  • Keep pets, debris, and water away
  • We may apply a curing compound to help prevent cracks

Even though the patio will look ready, it’s important to let it cure properly to build strength.

Step 6: Full Curing Time

Concrete continues to strengthen as it cures. While light foot traffic is often safe after 48 hours, full curing can take up to 28 days. During this time:

  • Avoid placing heavy furniture or grills
  • Don’t drive over the patio if it connects to a driveway
  • Keep it clean and dry

At Bill’s Custom Concrete, we provide detailed aftercare instructions to ensure your patio cures perfectly for long-term performance.

Factors That Affect Installation Time

While a basic concrete patio installation can take as little as 3 to 5 days, here are a few factors that may add to the timeline:

1. Size and Shape

Larger patios take longer to prep, pour, and finish. Complex shapes with curves or multiple levels also require more time and precision.

2. Custom Finishes

Stamped or stained concrete requires additional steps, including coloring, patterning, and sealing. These add both beauty and time to your installation.

3. Weather Conditions

Heavy rain or extreme heat can delay the pour or affect curing time. We monitor forecasts closely to choose the ideal window for your project.

4. Site Accessibility

Difficult terrain or tight spaces can increase the time it takes to deliver and pour concrete.

Why Choose Bill’s Custom Concrete & Yard Drainage?

When you choose us, you’re not just getting a patio—you’re getting peace of mind. With decades of experience installing concrete structures across OKC, we offer:

  • Custom design to fit your outdoor lifestyle
  • Skilled craftsmanship with precision pouring and finishing
  • Top-quality materials to ensure long-lasting durability
  • Transparent timelines with no hidden surprises

From patios and driveways to drainage systems and concrete slab repair, we do it all with professionalism and pride.

Ready to Transform Your Backyard?

Turn your backyard into a beautiful, functional retreat with a custom concrete patio from Bill’s Custom Concrete & Yard Drainage. Whether you’re hosting gatherings or relaxing with family, our expert team will design and install a durable patio that complements your home and lifestyle.

Call us today at (405) 755-3975 to schedule your consultation. We’ll assess your space, recommend the right design, and give you a clear timeline, so you can enjoy your new outdoor space sooner than you think.

Read More