top pop off my concrete

Why Did the Top Pop Off My Concrete? Common Causes & Solutions

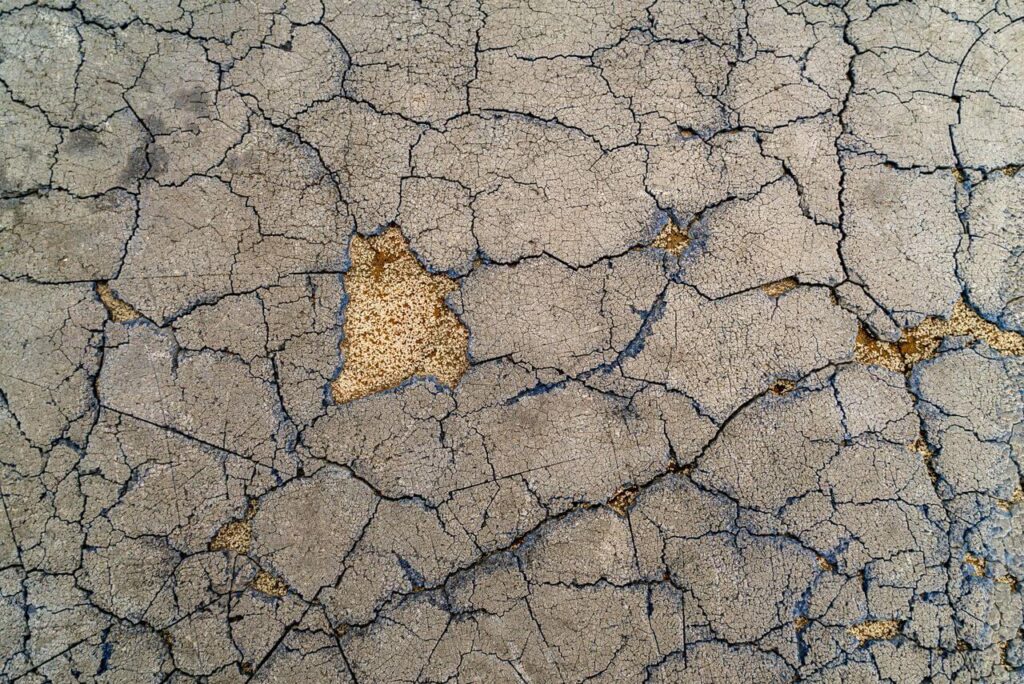
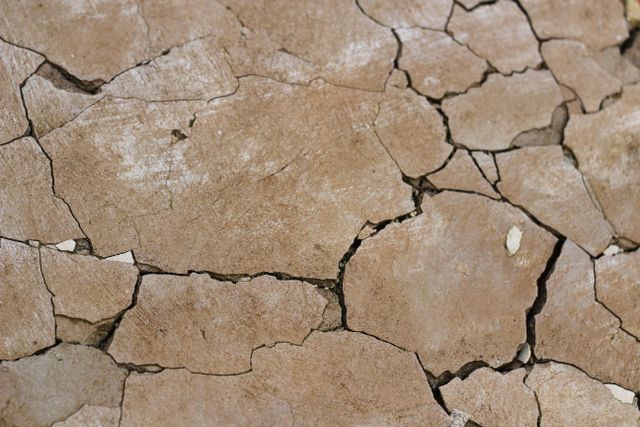
That slab looked perfect the day it went down. Now the surface is flaking, chipping, or peeling off in patches, and you’re standing there asking, why did the top pop off my concrete? Concrete surface failure – most people call it spalling – is one of the more aggravating problems a homeowner runs into. We see it all the time at Bill’s Custom Concrete & Yard Drainage. The upside is that most cases can be prevented, and a good number can be fixed. Here’s what causes concrete tops to pop and what you can actually do about it!

What Actually Causes Concrete to Pop and Flake?

Spalling almost never comes down to a single thing. Usually it’s several factors ganging up on the slab over time. Figure out the real cause, and you’re already halfway to a repair that lasts.

How Freeze-Thaw Cycles and Moisture Infiltration Damage Concrete Surfaces

Water is the usual suspect. Moisture works its way into the top layer of concrete, then freezes, and when it freezes, it expands – about 9% by volume. That’s a lot of pressure building up in a place that can’t stretch to accommodate it. Run through enough freeze-thaw cycles, and the top layer starts to crack. Then it chips. Then you’ve got concrete popping out in sheets. You’ll see this most in regions with rough winters, and especially on surfaces that were sealed badly or never sealed at all.

The Role of Alkali-Silica Reaction (ASR) in Concrete Deterioration

ASR is a chemical reaction happening deep inside the concrete. Alkalis in the cement paste react with certain silica minerals in the aggregate, and the result is a gel that soaks up water and swells. That swelling pushes outward from within, and the surface eventually cracks and pops. ASR is slow – it can take years to show its face. But once it gets going, it keeps going, and it won’t stop on its own.

Why Poor Installation Practices and Drainage Issues Lead to Surface Failure

Concrete is only as good as the work behind it. Finish the surface too soon, before the bleed water has evaporated, and you trap moisture under the top layer. That moisture has nowhere to go. It weakens the surface and sets it up to delaminate – and those pop-outs in concrete are often the first visible sign something went wrong during the pour.

Poor grading and lousy drainage do their own damage by letting water pool on or around the slab. This is why we keep telling clients the pour is just one piece of the puzzle. Site prep and drainage planning carry just as much weight.

How Aggregate Problems and Low-Quality Materials Weaken the Surface Layer

What goes into the mix shapes how long the slab holds up. Aggregate that’s contaminated with clay, loaded with silt, or full of reactive silica can wreck the bond inside the concrete. Inconsistent aggregate sizing leaves weak spots – little zones where the surface gives out first under load or weather. Skimping on materials saves you a bit at the start. The repair bill down the road tends to erase that saving, and then some.

The Impact of Excessive Water Content During the Initial Pour

Adding extra water to the mix is a common shortcut, usually done to make it easier to work with. It does make the day of the pour go smoother. It also quietly robs the finished slab of strength and durability. A high water-to-cement ratio leaves you with a more porous surface, and porous concrete drinks up moisture – which means more freeze-thaw trouble and faster breakdown overall. Even a modest splash of extra water shows up in how the slab performs years later.

causes of concrete to pop off

What Are the Best Professional Fixes for Concrete Surface Spalling?

Minor popping often responds well to a quality resurfacer or a polymer-modified overlay. These bond to the existing slab and bring back a smooth, durable finish. If you’ve been searching for how to fix peeling concrete, this is usually the starting point – but if the damage runs deep or covers a wide area, resurfacing won’t cut it. Then we’re usually looking at removing the affected section and replacing it with a proper mix, finished the right way.

After any repair, we apply a penetrating sealer to slow future moisture from getting in. In freeze-prone areas, we lean toward a breathable formula – one that lets trapped moisture escape without inviting new water back in.

Frequently Asked Questions

Can I fix concrete spalling myself, or do I need a professional?

Small, shallow chips over a limited area? A hardware-store resurfacer can handle those. Anything bigger, or popping that keeps spreading, deserves a professional look from our team. Guess wrong on the cause and your repair can fail before the year’s out.

How long does a professional concrete repair typically last?

When the root cause is dealt with properly, a repair can hold for decades. The trick is matching the fix to the problem. Lay a nice overlay over structurally compromised concrete, and it won’t last, no matter how good the product is.

Does concrete sealing prevent the top from popping off?

Sealing cuts your risk of moisture-related spalling by a lot. It doesn’t cover every cause, though – it won’t stop ASR or undo a bad pour. Still, regular sealing is one of the smartest preventive habits a concrete owner can build.

Protect Your Concrete Before the Damage Gets Worse

Spalling tends to speed up once it starts. A single chip this season can spread into a real mess by next year. If your concrete is popping, cracking, or flaking, we’re glad to help you diagnose it and point you toward the right fix at Bill’s Custom Concrete & Yard Drainage – whether that’s a targeted repair or a full replacement. If you’re looking for concrete sidewalk repair near OKC, for example, reach out to our team today and get a professional assessment before things get worse!

Read More
How Do You Calculate Concrete Needed for a Patio or Slab?

How Do You Calculate Concrete Needed for Patio or Slab?

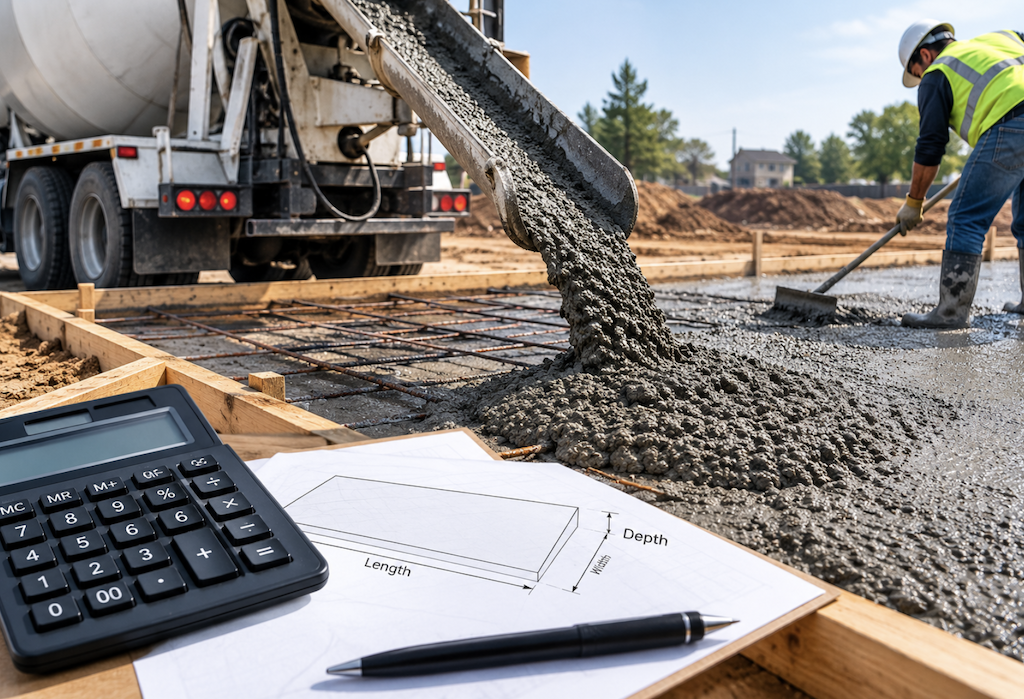
Nail the concrete calculation on your first try, and the rest of the job falls into place. How Do You Calculate Concrete Needed for a Patio or Slab? It starts with getting your measurements right and using the correct formula. Come up short, and the pour stops halfway, with everyone standing around waiting. Go too big and you’ve bought material that ends up curing into a useless boulder near the fence. Both happen more than you’d think. Both are also easy to sidestep – you just need one formula and a tape measure you actually trust.

So what are you building? A patio out back, maybe. A garage slab. A decorative surface by the front steps – or maybe you’re looking into professional concrete staining in OKC to finish things off right. Whatever it is, this guide walks you through figuring out how much concrete you’ll need. You’ll learn to measure the space, convert those numbers into cubic yards, and steer clear of the slip-ups that catch people right at the ordering stage.

Remember, professional help from Bill’s Custom Concrete & Yard Drainage is just a phone call away!

Why Concrete Is Measured in Cubic Yards, Not Square Feet

Square feet are where most people start, and honestly, that instinct makes sense. Measure length, multiply by width, done. You’ve got your area.

But concrete suppliers don’t think that way. They deal in cubic yards, because concrete isn’t flat – it has depth on top of length and width. What they care about is the total volume of material going into the ground, not the surface it happens to cover.

One number is worth memorizing here: a single cubic yard equals 27 cubic feet. That’s the hinge everything in this guide swings on. Keep it in your head, and the phone call to your supplier gets a whole lot less confusing.

How to Calculate Concrete Needed for the Square Footage of Your Project Area

Measuring a Simple Rectangular Patio or Slab

Start with the easy version. Measure the length and the width of your area in feet, then multiply them. There’s your square footage. A patio 12 feet wide by 20 feet long? That’s 240 square feet. No tricks involved.

Breaking Down Irregular or L-Shaped Areas

Not every slab is polite enough to be a neat rectangle. When yours takes an L-shape or some other odd form, break it into smaller rectangles. Figure the square footage of each chunk, then total them up. The math stays simple, and you’re far less likely to let an error creep into your final order. How do you figure concrete in yards? This is exactly the kind of groundwork that makes the rest of the calculation reliable.

Converting Square Footage to Cubic Yards Using the Right Formula

Choosing the Correct Depth for Your Pour

Depth is the number that quietly wrecks DIY calculations, and it moves your yardage more than anything else. Here are the usual guidelines:

  • Standard residential patios: 4 inches is typical
  • Driveways and anything holding vehicle weight: usually 6 inches
  • Heavier structural slabs: often more than that

One step before the formula: convert that depth from inches into feet. Four inches becomes 0.33 feet. Six inches becomes 0.5 feet.

Applying the Concrete Calculation Formula

Now that your square footage and depth are both in feet, the math is short and forgiving. This is the core of how to figure concrete yards for any project:

(Square Feet × Depth in Feet) ÷ 27 = Cubic Yards

Take that 240-square-foot patio again, poured 4 inches deep. Run it through: (240 × 0.33) ÷ 27 lands you at roughly 2.93 cubic yards. Round that up, then add a waste buffer – more on that in a second.

Common Mistakes That Lead to Ordering the Wrong Amount of Concrete

Ignoring Slope, Grade, or Uneven Ground

Ground that slopes or dips will drink up more concrete than you’d expect, since you need extra to bring the surface level. Your depth won’t stay consistent across the whole pour. Walk the site and account for its quirks before you lock in a number – it matters a lot when learning how to find yards for concrete comes down to real-world conditions rather than a flat-surface estimate.

Skipping the 10% Waste Buffer

Some concrete spills. Some vanishes into over-excavated ground. And your measurements are probably off by a hair somewhere. Tack 10% onto your final cubic yard figure, and you’ve got most of that covered. On a 3-yard pour, that’s under a third of a yard – cheap insurance against coming up empty.

Miscalculating Depth and Underestimating Its Impact

Add one inch of depth across a large slab, and you can tack on nearly a full cubic yard. That’s not a rounding hiccup. That’s real material and real money. Measure your depth twice, and when the figure feels wobbly, run it past our team before you commit.

Frequently Asked Questions

How Many Cubic Yards Do I Need For A 10×10 Patio?

A 10×10 patio is 100 square feet. Poured at the standard 4-inch depth, that comes to about 1.23 cubic yards before waste. Fold in the 10% buffer and plan for roughly 1.35 cubic yards. When it comes to figuring yards of concrete needed, that buffer is the step most people skip – and regret.

What Happens If I Order Too Little Concrete?

You end up with a cold joint – the seam where fresh concrete hits a pour that’s already begun to cure. It’s a weak point, and it tends to crack over time. Running short mid-job ranks among the pricier mistakes in this trade, which is exactly why we’d rather see you order a little extra.

Can I Use An Online Calculator Instead Of Doing The Math Manually?

Sure, as a starting point. What those tools miss is everything specific to your site: the slope, the soil, an awkward footprint. Before anything gets finalized, we always sit down and check the numbers with our clients.

Get Your Concrete Order Right the First Time

Good numbers protect your budget, keep the timeline on track, and leave you with a slab that lasts. The formula’s the easy part. It’s the little details that ask for some patience.

Homeowners, contractors, projects of every size – we work with all of them across the area. If your measurements have you second-guessing, or you’d just like another set of eyes before the order goes in, reach out. We’re happy to help at Bill’s Custom Concrete & Yard Drainage. Why not make your life easier and allow us to take the pressure off?

Read More
figuring how much concrete needed

How to Figure Out Yards of Concrete Needed?

Nail down your concrete estimate before the truck arrives, and you’ll save yourself a headache later. Guess low, and you’re stuck waiting on a second delivery while everything you’ve poured starts to firm up. Guess high, and you’ve paid for concrete that ends up as a lump in the chute. Both hurt the wallet.

We’ve done this endless times now at Bill’s Custom Concrete & Yard Drainage. And the one thing property owners ask us again and again? How do you calculate concrete yardage for a project like mine? Fair question. Here’s the whole process – what the pros rely on, how you can run the numbers yourself, and why leaving room for waste is every bit as important as measuring right.

Understanding the Unit Professionals Use: What is a Cubic Yard of Concrete?

Concrete is sold by the cubic yard. If you’ve ever wondered what are the dimensions of a yard of concrete, here’s your answer: one cubic yard equals 27 cubic feet – a cube 3 feet on every side. When a supplier gives you a price “per yard,” this is what they’re talking about. Once this clicks, the rest of the math falls into place.

How to Calculate the Volume of Your Concrete Project

Here’s the formula everyone in the trade uses:

Length (ft) × Width (ft) × Depth (ft) ÷ 27 = Cubic Yards

Calculating Concrete for a Standard Slab or Driveway

Working with a rectangular slab – a driveway, patio, or garage floor? Measure the length and width in feet. Then settle on your depth, again in feet. Driveways usually get poured at 4 inches, or 0.33 feet. If the slab needs to carry heavier weight, you might bump that to 6 inches, which is 0.5 feet.

Say you’ve got a driveway 20 feet long, 10 feet wide, and 4 inches (0.33 feet) deep. Plug it in:

20 × 10 × 0.33 ÷ 27 = 2.44 cubic yards

Calculating Concrete for Footings, Columns, or Irregular Shapes

Footings and columns run on the same idea, except now and then you’re dealing with a cylinder rather than a rectangle. When that happens, reach for this one:

π × Radius² × Depth ÷ 27 = Cubic Yards

And if the shape is odd or awkward? Split it into smaller rectangles or circles, work out each piece on its own, then total them. Tedious, maybe. But it keeps mistakes to a minimum, and it’s how our crew handles the more complicated custom pours.

Why Adding a Waste Factor Is Essential to Every Estimate

The raw math gives you a clean, theoretical number. What it misses is everything that happens once the truck actually shows up and the concrete starts flowing.

The Common Causes of Concrete Waste on Residential and Commercial Projects

Uneven subgrade tends to cause the most trouble. A slight dip in the ground under your slab means more concrete to bring the surface level. On top of that, you get spills mid-pour, small gaps between your form dimensions and reality, and that stubborn leftover clinging to the chute at the end. Each one feels minor. Together, they’re not.

How Much Extra Concrete Should You Order?

Add a 5 to 10% buffer to whatever your total comes to. Smaller jobs and tricky, irregular shapes? Go with the higher end and order 10%. A clean, straightforward slab sitting on a smooth, well-compacted base can usually get by with 5%.

Circle back to the driveway at 2.44 cubic yards. Tack on 10%, and you’re at roughly 2.68 cubic yards. If you want a quick double-check, running the numbers through a concrete calculator yard tool can confirm you’re in the right range. Since most suppliers sell in quarter- or half-yard steps, you’d round up to 2.75 and be done with it.

When to Consult a Professional for Your Concrete Estimate

A garden path or a small patio? The math above will carry you fine on your own. Once you step up to driveways, foundations, structural slabs, or anything with tricky geometry, though, it pays to bring in a professional concrete company before you order anything.

Get the number wrong on a big pour and it’s not just a bigger invoice. You risk cold joints – where one section starts setting before the next gets poured – along with structural weak spots, or a full tear-out and redo that nobody wants to pay for. Whether you’re handling a driveway or working with local foundation repair companies near OKC on something more involved, every project we take on gets a detailed estimate built around the actual site, the depth you need, and the material specs, so the figure you’re handed holds up.

FAQs

How Thick Should A Concrete Slab Be For A Residential Driveway?

Four inches covers most residential driveways. Planning to park something heavier, like a truck or an RV? Then 5 to 6 inches is the safer depth.

Can I Use An Online Concrete Calculator Instead Of Doing The Math Manually?

You can, and they’re a decent place to start. Use one as a second opinion rather than the final word, and add your waste factor by hand before you commit to an order.

What Happens If I Run Out Of Concrete Mid-Pour?

You end up with a cold joint – a weak seam where the first batch sets before the second one lands. It chips away at the slab’s strength. Ordering a bit extra beats coming up short every time.

Read More
Remove Paint from Concrete

How Do You Remove Paint from Concrete?

Getting paint off concrete sounds like a quick weekend job. It rarely is. Maybe some overspray survived a renovation, or a paint can tipped over in the garage, and you didn’t notice until it dried, or there are old lines on the driveway that have quietly refused to leave. Wherever it came from, soap and a scrub brush aren’t going to save you. The upside? Give it the right method and a bit of patience, and the concrete underneath comes back looking like itself again.

We’ve walked a lot of people through this same mess, and the one thing we keep coming back to is that no single fix works across the board. It depends on the paint, how long it’s been baking into the surface, and what kind of shape the concrete is in to begin with. Here are three approaches that actually deliver. Read through them and see which one matches what you’re dealing with!

Method 1: Pressure Washing

When Does Pressure Washing Work Best?

Fresh paint or light staining? Start here. When paint hasn’t fully cured into the concrete, a hard stream of water can often peel it up before it settles in for good. The catch is power. You’ll want a pressure washer pushing 3,000 PSI or more. Your garden hose, sadly, is just going to get the floor wet.

Coat the area first with a concrete degreaser or a paint prep solution, and let it sit for 10 to 15 minutes. Then work the surface with a 15-degree nozzle, moving in steady, overlapping passes. Rush it or hold it in one spot, and you’ll end up with streaks or, worse, gouges. Older or thicker paint usually won’t surrender to water alone, but even then, this is a smart opening move before you reach for something stronger – and often the best way to remove paint from concrete when the spill is still relatively fresh.

Method 2: Chemical Paint Strippers

Which Paint Stripper Should You Use?

Once paint has cured, chemicals become your best friend. There are two kinds worth knowing.

Solvent-based strippers are the fast ones, and they’re especially good on oil-based paint. They sink into the paint film and loosen its grip on the concrete. Biochemical strippers, sometimes called caustic strippers, take their time. You might be waiting a couple of hours. But they’re gentler, and they’re the better call indoors or anywhere strong fumes would be a problem – which matters more than people expect when you’re figuring out how to get paint off concrete in an enclosed space.

How to Apply a Stripper Safely

Put it on thick with a stiff brush or roller. Cover the whole area with plastic sheeting so it doesn’t dry out before it can work, then let it dwell for as long as the manufacturer says. Once you see the paint bubbling and lifting, scrape it away with a floor scraper. A stubborn patch here and there might need a second coat.

This is not the place to get casual about safety. Chemical-resistant gloves, safety goggles, decent ventilation – all of it matters when you’re handling any stripping agent. And when the job’s finished, dispose of the waste properly and by whatever your local rules require.

Method 3: Mechanical Removal (Scraping and Grinding)

When Is Grinding the Right Call?

Thick paint, layered coatings, hardened epoxy – this is where grinding earns its keep. You’re looking at an angle grinder with a diamond cup wheel, a floor grinder, or a shot blasting machine, and which one depends entirely on the size of the job.

Small stuff, like a painted step or a corner of the garage floor, is fine for a handheld grinder. Take on a full driveway or a warehouse floor, though, and walk-behind equipment saves you both time and a sore back, and it finishes more evenly too – something worth thinking about if you’re also weighing options like a decorative concrete patio cost in Oklahoma City where surface prep really matters.

Just keep an eye on the surface. Grind too hard, and you’ll tear up the top layer of the concrete before you know it. Test a small area first to see how it behaves. And wear a respirator and eye protection, because grinding throws off fine silica dust, and that stuff does genuine damage to your lungs over time.

FAQs

Does Vinegar Remove Paint From Concrete?

White vinegar can soften small spots of latex paint if you apply it straight and let it soak. It won’t budge cured or oil-based paint, so it’s not something we’d count on for a real job.

Will Paint Remover Damage Concrete?

Used properly and not left sitting too long, most strippers leave sealed or dense concrete alone. Older, porous concrete is a bit more fragile. Test a hidden spot first and stick to the instructions.

Can I Remove Paint Without A Pressure Washer?

You can. Chemical strippers and grinding both work well on their own. Which one fits comes down to the size of the area and how deep the paint has gone.

The Bottom Line

Remove paint from concrete and the job turns manageable the moment you match the method to the mess. Fresh spills wash off, cured paint wants a stripper, and heavy coatings need grinding – and plenty of jobs go smoothest with a mix of two.

Still not sure where to start, or staring at a large or delicate surface? Reach out to Bill’s Custom Concrete & Yard Drainage. Our concrete Specialists can take a look and steer you toward the safest, most effective way forward!

Read More
Long Does It Take for Concrete to Dry

How Long Does It Take for Concrete to Dry?

Concrete is about as dependable as building materials get. But that reliability comes with a condition: it has to cure on its own schedule, not yours. Push it too fast, and you invite cracking, surface flaking, or worse – structural problems that cost real money to put right. We’ve watched people learn that the hard way at Bill’s Custom Concrete & Yard Drainage. How long does cement take to dry? Knowing isn’t just handy trivia. It’s the difference between a job done once and a job done twice.

Here’s the quick version. Concrete sets firm enough for light foot traffic in about 24 to 48 hours, but it doesn’t hit full strength until roughly 28 days have passed. The longer version has more moving parts. Several things affect the timeline, and understanding what happens at each point will save you a headache later.

What Affects How Long Concrete Takes to Dry?

Mix Design

The ratio of water to cement in your mix does a lot of the heavy lifting here. More water makes the concrete easier to work with, but it also drags out the curing time. Less water speeds up strength development, though it can be a pain to place and finish properly. There’s a trade-off either way.

Then there are admixtures – chemical additives used in professional work. Depending on what the project calls for, these can either speed the cure up or slow it down on purpose. It’s one more reason why high-quality stamped concrete Oklahoma City professionals factor mix design into every job from the start.

Weather, Humidity, and Airflow

Conditions on site matter more than people expect. When it’s hot and dry, the surface can dry out well before the concrete underneath has cured, and that mismatch leads straight to cracking. Cold does the opposite. It slows the chemical reaction – hydration – that gives concrete its strength. Drop below 50°F and things nearly stall.

Moisture in the air plays a part too. High humidity slows evaporation, and if you’re pouring in an enclosed space with poor airflow, expect the timeline to stretch. We plan every pour around the local climate, and it’s worth doing the same on your end.

The Three Stages of Curing

Stage One: Initial Set (0 – 8 Hours)

This is when concrete stops being a workable, movable material and firms into something solid. It usually happens somewhere between 2 and 8 hours after the pour, depending on your mix and the weather. The surface will feel firm, but don’t be fooled – it’s fragile. Foot traffic, dropped tools, or any weight at all can leave permanent marks.

Stage Two: Final Set (24 – 48 Hours)

By the one-to-two-day mark, concrete reaches its final set. Light foot traffic is generally fine now. Vehicles and heavy loads are not – keep them off. The concrete is still building strength quickly during this window, and any stress you put on it can quietly undermine how it performs down the line. If you’ve ever wondered about cement to dry and how long is really enough, this stage is where patience genuinely pays off.

Stage Three: Full Cure (28 Days)

Concrete gets to about 70% of its design strength in the first week. Full strength arrives around day 28. That’s the benchmark engineers and contractors rely on across the board. For driveways, slabs, and anything structural, waiting out the full cure before piling on heavy loads is simply the smart move.

Why It Pays to Listen to a Pro

We get the temptation to hurry. Timelines are tight, and waiting the better part of a month to use a fresh surface feels ridiculous. But cutting the cure short is one of the most common mistakes we run into – and one of the easiest to avoid.

Pouring concrete isn’t a walk-away job. We keep an eye on conditions, apply curing compounds when they’re needed, and shield fresh pours from rain, frost, and blistering heat. Small steps, big difference. Cured properly, a concrete surface can last decades. Rushed, it might start falling apart in a handful of years.

FAQs

Can I Walk On Concrete After 24 Hours?

Usually, yes – light foot traffic is fine after 24 to 48 hours. Just don’t drag heavy objects across it or walk on it in sharp footwear that could scratch or gouge the surface while it’s still hardening.

What Does Cold Weather Do To Drying Time?

It slows hydration considerably. Below 50°F, concrete takes much longer to reach usable strength. Below freezing, it can suffer permanent damage unless it’s properly protected.

Does Concrete Ever Stop Curing?

Not entirely. It keeps gaining a little strength for years. But the 28-day mark is where the industry agrees it has reached its functional design strength – and understanding how long cement cure takes is what helps you make smarter decisions from the start.

Get It Right the First Time

Concrete drying isn’t something to guess your way through. The variables are real, rushing gets expensive, and the right approach is what separates a surface that lasts from one that doesn’t.

Our team knows how to plan, pour, and cure concrete correctly for any job. Get in touch with Bill’s today to talk through your project and grab a free quote!

Read More