A person in a reflective vest works on blueprints at a desk with a laptop, hard hat, calculator, and stationery.

Cost Factors in Stamped Concrete Projects

Stamped concrete is a popular choice for homeowners and businesses looking to add a decorative touch to their outdoor spaces, such as driveways, patios, walkways, and pool decks. While it offers the beauty and texture of expensive materials like stone, brick, or wood, stamped concrete is often more affordable and easier to install. However, like any construction project, the cost of stamped concrete can vary widely depending on several factors. Understanding these cost factors can help you budget for your project and make informed decisions.

1. Size of the Area

One of the most significant factors influencing the cost of a stamped concrete project is the size of the area you want to cover. Larger areas will naturally require more concrete, more labor, and more time to complete, leading to higher costs. Whether you’re installing stamped concrete for a small patio or a large driveway, the amount of material and the complexity of the installation process will directly impact the price.

For example, a small patio may cost less because it requires fewer materials and less time to complete, while a large driveway will increase the cost due to the extra materials and work involved.

2. Design Complexity

Stamped concrete can be designed in various patterns and textures, ranging from simple geometric shapes to intricate, custom designs that mimic natural materials like stone, brick, or wood. The more complex the design, the higher the cost.

Simple patterns, such as a brick or cobblestone design, will typically cost less because they use basic stamp molds and require less skill to install. However, more detailed designs, like custom logos, borders, or multicolor patterns, will increase the cost. This is because the stamps used for these patterns are often more expensive, and the installation process may take longer.

Additionally, some designs require multiple stages of stamping, adding layers of color or texture, which can increase labor costs. If you opt for a unique, customized design that requires custom-made stamps, the costs can escalate significantly.

3. Coloring and Staining

The color of your stamped concrete can also influence the overall cost. Stamped concrete can be colored in several ways:

  • Integral color: This is when the color is added to the concrete mix before it’s poured. It offers a uniform color throughout the slab but tends to be more expensive.
  • Surface coloring: This involves applying color after the concrete is poured, using stains or color hardeners. While it can be less expensive than integral color, the final color may not be as consistent.
  • Acid stains: These stains react with the concrete to create a unique, variegated color. This option is more labor-intensive and may raise costs.

Custom color combinations or multicolor techniques can add significantly to the cost of your stamped concrete project. Keep in mind that the more colors or layering techniques used, the more labor and time required to finish the job, which will naturally increase the price.

For high-quality services, call our professionals in concrete coloring in OKC at Bill’s Custom Concrete & Yard Drainage at 405-755-3975. We offer professional coloring solutions to enhance the beauty and durability of your stamped concrete projects.

4. Labor Costs

Labor costs are another crucial factor in determining the total cost of a stamped concrete project. Skilled labor is required for the proper installation of stamped concrete to ensure the best finish and long-lasting results. The expertise of the contractors plays a significant role in the quality of the work, and as such, more experienced or reputable contractors may charge higher rates.

The complexity of the design and the difficulty of the installation process will also affect the labor costs. If your project requires custom patterns, additional layers of color, or intricate detailing, the labor will take more time and skill, thus increasing the overall price.

5. Preparation and Site Conditions

A construction worker in an orange hard hat and vest examines blueprints in an industrial setting, focused and attentive.

Before the concrete can be poured and stamped, the area must be properly prepared. This may include excavating the site, removing existing pavement or landscaping, and ensuring proper drainage. Site preparation is especially crucial for larger areas or for projects that involve uneven surfaces.

If the site requires extensive preparation, such as leveling the ground or addressing drainage issues, the cost will increase. Similarly, if the area is difficult to access or has obstacles like trees or structures in the way, it may add to the overall cost due to the additional effort needed for preparation.

6. Thickness of the Concrete

The thickness of the concrete slab also plays a role in determining the final cost. Standard stamped concrete typically requires a thickness of 4 inches, but if you need a thicker slab (for example, for heavy vehicle traffic or areas with freeze-thaw conditions), the cost will rise. Thicker concrete uses more material, and the additional labor required to properly install it can increase costs.

7. Location and Accessibility

The location of your project can affect the cost of stamped concrete, primarily due to factors like transportation and accessibility. If your home or business is located in a remote area or somewhere with limited access to delivery trucks, the cost of transporting the concrete and equipment may be higher.

Additionally, labor rates can vary depending on your location. Contractors in larger cities or high-demand areas may charge more due to the higher cost of living and increased competition for services.

8. Sealing and Maintenance

Sealing is an important part of the stamped concrete installation process because it helps protect the surface from stains, moisture, and UV damage. The cost of sealing the concrete should be factored into the total price of the project.

While sealing is an optional service, it’s highly recommended to maintain the appearance and longevity of your stamped concrete. The cost of the sealer itself and the labor to apply it will be an additional expense on top of the installation costs. Regular resealing may also be necessary every few years, which adds to long-term maintenance costs.

Get Your Stunning Stamped Concrete Today!

If you’re ready to transform your outdoor space with beautiful, durable stamped concrete, Bill’s Custom Concrete & Yard Drainage is here to help. Our experienced team will guide you through every step, from design to installation, ensuring your project stays on budget. Call us now for stamped concrete services in OKC at 405-755-3975 and let us bring your vision to life!

Read More
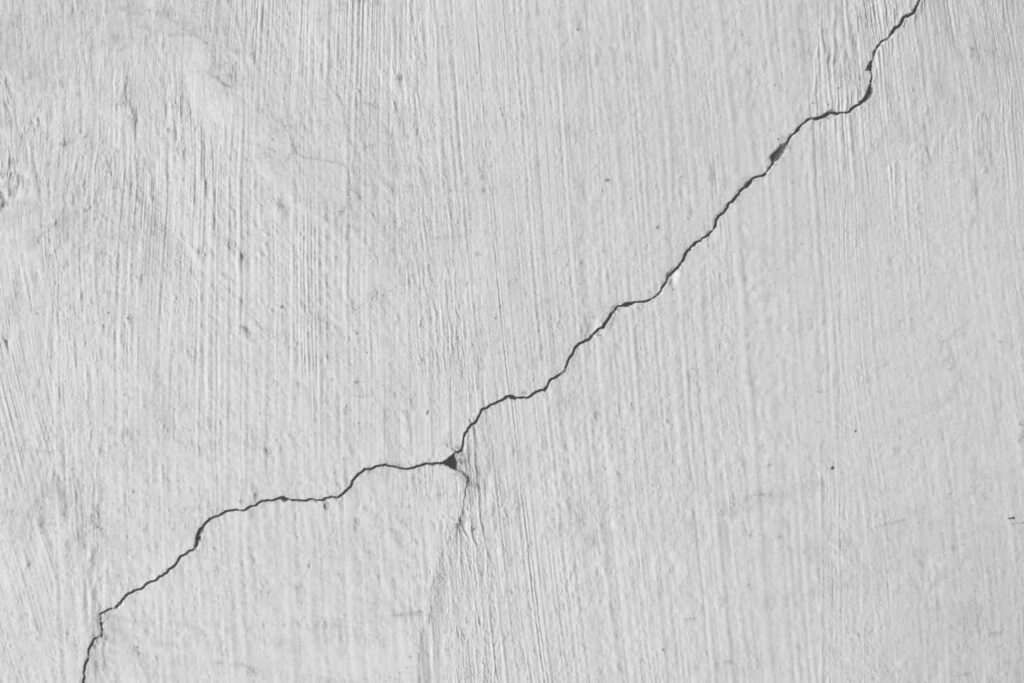
Close-up of a horizontal foundation crack on a white concrete wall, indicating potential structural issues.

Horizontal Foundation Cracks: Causes & Prevention

As a homeowner, keeping an eye on the condition of your foundation is essential for the overall health of your house. One of the more concerning signs of foundation damage is horizontal foundation cracks. These cracks, often visible on the exterior or interior walls of the foundation, can signal serious structural issues. Unlike vertical cracks, which can appear as the house settles over time, horizontal cracks often point to pressure building up against the foundation. If not addressed quickly, these cracks can lead to bigger problems such as bowing walls, water seepage, and even a weakening of the entire foundation.

We understand how important it is to catch issues with your foundation early. In this blog, we’ll explain what causes horizontal cracks in foundations, how to prevent them, and when it’s time to seek repair. If you’re in Oklahoma City and need professional help, we’re here to offer our professional services in foundation crack repair in Oklahoma City.

What Causes Horizontal Cracks?

Horizontal cracks in your foundation usually occur because of external pressures that push against the walls. Unlike cracks that form due to settling or aging, horizontal cracks are a clear indication of significant force being exerted on your foundation. Below are some of the main causes behind these types of cracks:

Hydrostatic Pressure

One of the leading causes of horizontal cracks is hydrostatic pressure. When heavy rainfall, snow, or even poor drainage around the home causes the soil to become saturated with water, it creates significant pressure against the foundation walls. The more water that builds up around the foundation, the more pressure it places on the walls, especially if the ground around the house is sloped toward the foundation.

In areas with improper or insufficient drainage systems, the water around the foundation doesn’t drain away effectively. This trapped water can lead to hydrostatic pressure, which is one of the main culprits of horizontal cracks. As this pressure increases, it can cause the foundation walls to crack horizontally, compromising the integrity of your home’s structure.

Expansive Soils

Another common cause of horizontal cracks is expansive soils, which are especially common in areas with clay-rich soil. Expansive soils tend to expand when they absorb moisture and shrink when they dry out. This swelling and shrinking movement can create a lot of stress on your foundation.

As the soil moves, it can put significant pressure on your foundation walls, eventually leading to cracks. The horizontal cracks form as the soil expands against the foundation in one direction. Over time, this constant movement can weaken your foundation and lead to more significant issues, including bowing walls.

Overloading the Foundation

In some cases, overloading the foundation can result in horizontal cracks. Overloading occurs when the weight of the house or external factors (such as an addition, heavy equipment, or improperly distributed weight) causes uneven stress on the foundation walls. This excess weight can push against the walls, causing horizontal cracks to form. In cases like this, the foundation is unable to bear the additional load and begins to crack under the pressure.

Foundation Settlement or Shifting

Foundation settlement, which occurs when the foundation shifts unevenly or sinks due to soil erosion or poor construction, can also lead to horizontal cracking. If part of the foundation settles more than other parts, the shifting can cause the foundation to buckle under pressure, resulting in cracks. While vertical cracks are more common with settlement, significant shifting or pressure can lead to horizontal cracks as well.

Join Tiranga Game for nonstop fun! Tiranga Game is India’s fastest-growing online gaming platform, offering a thrilling mix of skill-based games, real-money tournaments, and exciting Tiranga Lottery opportunities

How to Avoid Horizontal Cracks

Preventing horizontal foundation cracks begins with proactive measures to reduce the pressure on your foundation walls. Here are some steps you can take to help avoid the formation of horizontal cracks:

Improve Drainage Around the Foundation

The most effective way to prevent hydrostatic pressure is by managing water around your foundation. Ensure that your home’s gutters and downspouts are clean and functioning properly. Water should be directed away from the foundation to avoid any build-up around the base of your home. If necessary, consider installing French drains or foundation drainage systems to direct water away from the foundation more effectively.

Install Foundation Waterproofing

Another effective prevention method is installing a waterproofing membrane or coating around your foundation. Waterproofing will prevent water from seeping into the walls and creating hydrostatic pressure. It can also help reduce the risk of water damage to your foundation. Make sure to hire a professional to ensure the waterproofing system is installed correctly.

Soil Stabilization

If you live in an area with expansive soils, soil stabilization can help minimize the movement that leads to foundation issues. Techniques like soil compaction or using stabilizing agents can help prevent the soil from swelling and shrinking, reducing the pressure on your foundation. In some cases, soil injection methods can be used to stabilize the soil beneath the foundation.

Foundation Reinforcement

If you’re concerned about the weight distribution on your foundation, reinforcing the foundation walls can help. This can involve installing steel braces or carbon fiber supports that add strength to your foundation and help distribute the pressure more evenly. It’s essential to have a professional foundation contractor assess your foundation and recommend the right reinforcement techniques for your home.

Regular Foundation Inspections

One of the best ways to avoid serious issues is to have regular foundation inspections. Early detection of potential problems like minor cracks or moisture buildup can help prevent more significant issues from developing. A professional inspection will identify any signs of stress on the foundation, allowing for timely intervention.

When to Ask for Repair for Horizontal Cracks


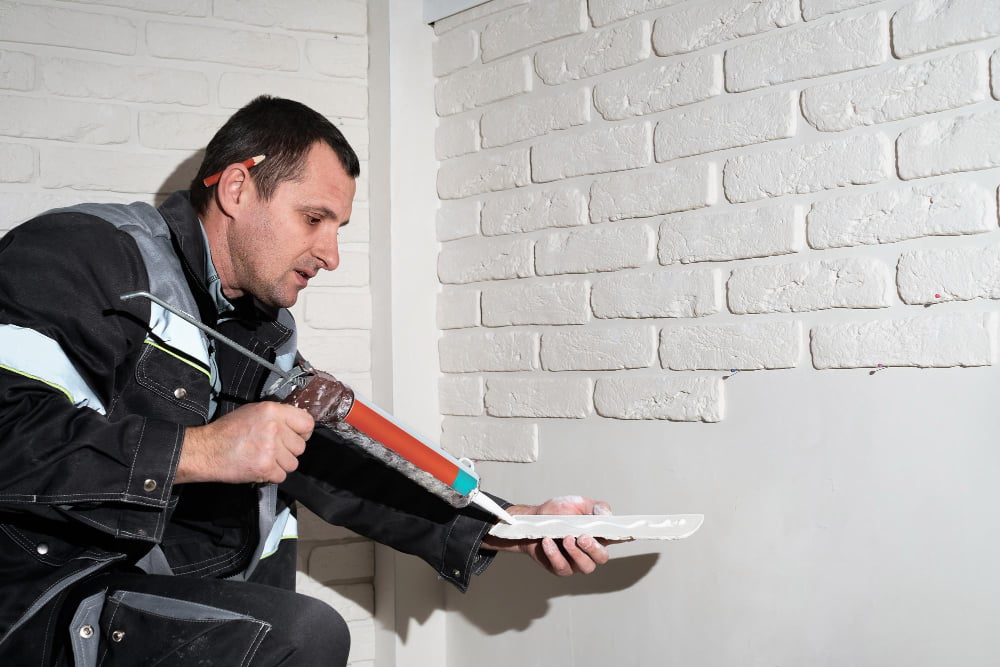
A man in a work jacket uses a caulking gun on a brick wall corner, applying sealant onto a putty knife.

Horizontal cracks are usually an indication that something is wrong with your foundation. While smaller cracks may not be immediately dangerous, it’s important to act quickly if you notice any of the following signs:

  • Widening Cracks: If the horizontal cracks continue to grow or get wider, it’s a sign that the pressure on the foundation is increasing and needs to be addressed.
  • Water Seepage: If water is coming through the cracks, it indicates that the foundation’s integrity is compromised and needs immediate attention to avoid further damage to the foundation and interior of your home.
  • Bowing or Leaning Walls: Horizontal cracks that are accompanied by walls that are bowing or leaning indicate severe structural damage. This requires immediate repair to prevent further collapse.
  • Uneven Floors or Doors That Won’t Close: If you notice that your floors are uneven or doors are difficult to open and close, it could be a sign of foundation movement. Horizontal cracks might be the cause, and professional repair is necessary.

If you notice any of these signs or suspect you have horizontal foundation cracks, don’t hesitate to seek help. Ignoring the issue can lead to costly repairs and more extensive damage to your home.

Protect Your Home with Professional Foundation Crack Repair

If you’ve discovered horizontal foundation cracks or are worried about the structural health of your foundation, don’t wait until it’s too late. At Bill’s Custom Concrete, we are skilled in foundation crack repair in Oklahoma City. Our team of professionals can assess your foundation, identify the cause of the cracks, and provide reliable solutions to restore the integrity of your home. As one of the leading concrete companies in OKC, we offer high-quality repair services to ensure your foundation remains strong and secure. Call us today at 405-755-3975.

Read More
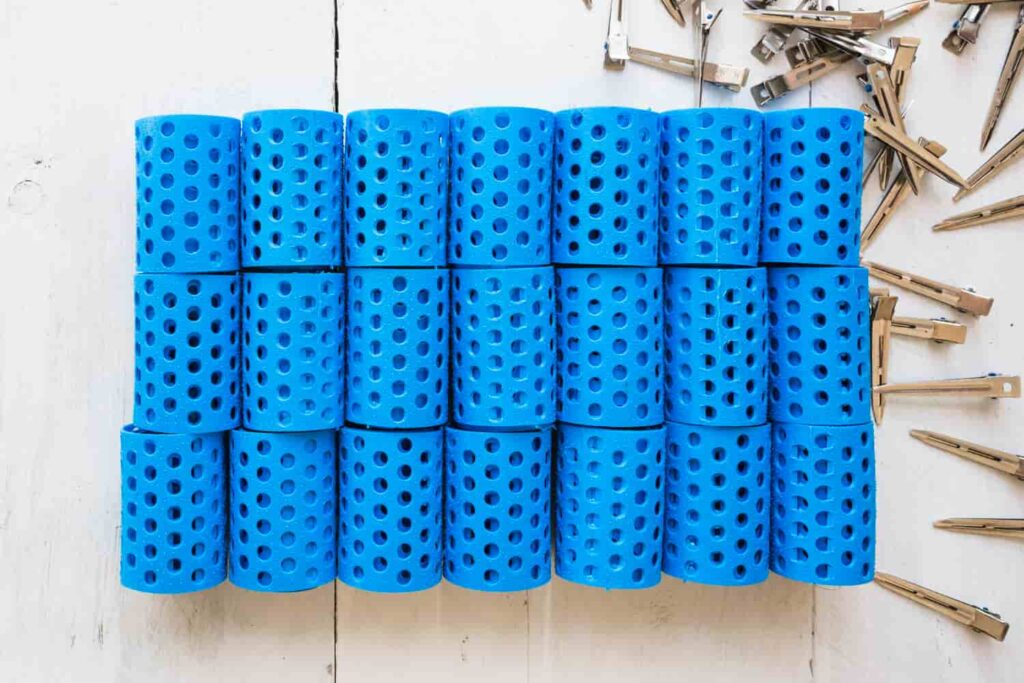
Blue perforated drainage pipes stacked on a white surface, with metal fasteners scattered nearby.

What are Perforated Drainage Pipes, and How Do They Work?

When it comes to ensuring that water flows efficiently and doesn’t cause damage to your home or landscape, one crucial system that many homeowners and contractors rely on is a perforated drainage pipe. But what exactly are these pipes, how do they work, and why are they so important in French drainage systems in OKC? Let’s dive into everything you need to know.

What Are Perforated Drainage Pipes?

Perforated drainage pipes are specially designed pipes that have small holes or slits, known as perforations, on their surface. These holes allow water to enter the pipe from the surrounding soil, which is then directed to a different location, usually away from a building or structure. The primary function of these pipes is to manage excess water, typically groundwater or rainwater, in areas where water accumulation is a problem.

These pipes come in various materials, but the most common types are made of PVC (polyvinyl chloride) and corrugated plastic. PVC pipes are rigid and durable, while corrugated plastic pipes are more flexible, making them easier to install in different configurations.

The idea behind perforated drainage pipes is simple: they let water in from the surrounding area but prevent debris like soil or rocks from entering and clogging the pipe. Thanks to their perforations, these pipes can effectively carry water away from areas like basements, yards, or around the foundations of buildings to prevent flooding and water damage.

How Do Perforated Drainage Pipes Work?

To understand how perforated drainage pipes work, imagine a common drainage problem: standing water in your yard or around the foundation of your home. If water isn’t able to flow properly, it can pool, creating a soggy landscape or, even worse, a flooded basement.

Here’s where perforated pipes come into play. When you install a perforated drainage pipe, you’re essentially creating a pathway for water to travel through the pipe and into a drainage system that carries it away.

Let’s break it down:

  1. Trenching: The first step in installing a perforated drainage pipe is to dig a trench in the desired location. The trench needs to be sloped to ensure that the water naturally flows downhill and into the pipe. 
  2. Pipe Installation: Once the trench is ready, the perforated pipe is laid inside. The holes in the pipe allow water from the surrounding soil to enter the pipe. If the pipe is part of a French drain system, gravel or rock is often placed around the pipe to help water flow freely into the perforations. 
  3. Water Flow: When it rains or when excess water accumulates in the surrounding area, the water will naturally seep into the perforations of the pipe. Gravity helps move the water through the pipe, which then directs the water to a designated area, such as a storm drain, a dry well, or a safe runoff area. 
  4. Filtering: Since the perforated pipe​ is designed to keep dirt, silt, and other debris from entering, it ensures that the water being drained remains clean and clear, which reduces the chances of clogging the pipe. However, it’s still important to regularly check the system to ensure the perforations don’t get blocked by larger debris.

    Need drainage solutions? Contact Bill’s Custom Concrete at 405-755-3975 for affordable French drain installation! 

Why Are Perforated Drainage Pipes Important?

Proper drainage is essential for preventing water-related problems in any environment. Without a reliable drainage system, excess water can lead to flooding, erosion, and even long-term structural damage to buildings. Perforated pipes are a popular choice for dealing with excess water because of their efficiency and reliability.

Here are a few reasons why perforated drainage pipes are crucial:

  1. Prevents Water Damage

The primary reason to install a perforated drainage system is to protect your property from water damage. Whether it’s a soggy lawn or water seeping into your basement, these pipes help direct water away from areas where it could cause issues.

  1. Protects Foundations

Water pooling around a building’s foundation can lead to cracks, shifting, and other serious issues. By installing a perforated drainage pipe system around the foundation, you can keep water from building up against the walls and help protect the structural integrity of your home.

  1. Reduces Erosion

Water that accumulates in one spot can lead to soil erosion, causing damage to landscaping and even affecting the stability of the ground. A perforated pipe can help redistribute water evenly, reducing erosion risks in areas like garden beds, lawns, or hillsides.

  1. Easy to Install

One of the benefits of perforated pipes, especially the corrugated ones, is their flexibility. This makes installation easier and faster in areas where a rigid pipe would be harder to maneuver. 

  1. Affordable and Effective

Perforated drainage pipes are often less expensive than other drainage solutions, and they are highly effective at redirecting water. Their relatively low cost makes them an appealing option for many homeowners looking for a cost-effective way to deal with drainage problems.


Where Are Perforated Drainage Pipes Used?

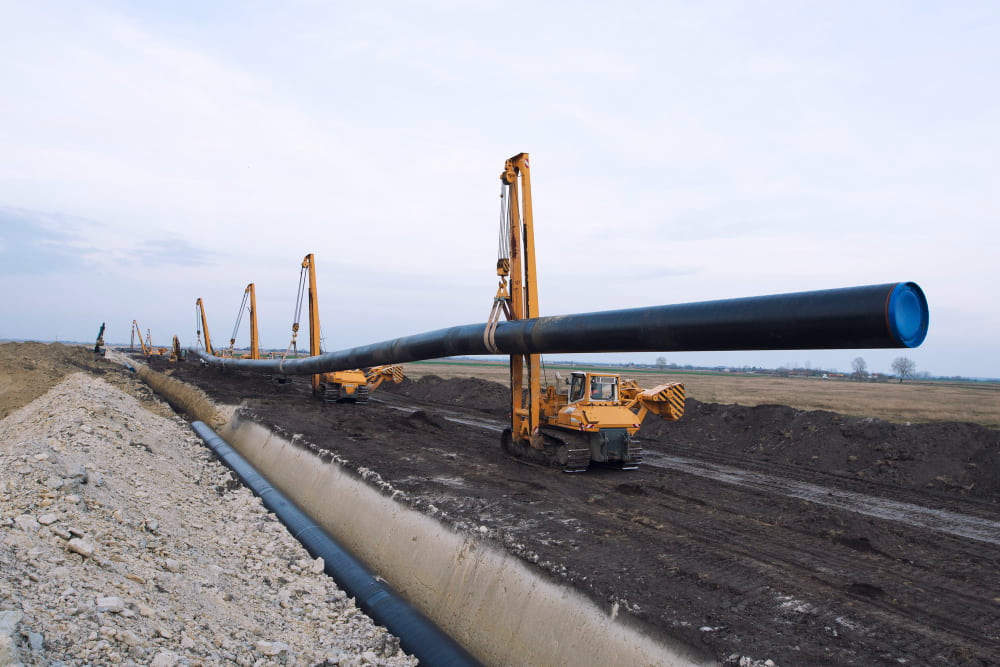
Large construction machinery is lifting a long pipe into a trench across an open field.


Perforated pipes have a wide range of applications in both residential and commercial settings. Here are some of the most common uses:

  1. Around Foundations

Perhaps the most common use of perforated drainage pipes is around a building’s foundation. This helps ensure that water doesn’t accumulate and cause basement flooding or structural damage to the home.

  1. Yard and Landscaping Drainage

If your yard is prone to pooling water after heavy rain, perforated pipes can help redirect the excess water. Whether installed in a French drain system or along low-lying areas of your yard, they can effectively manage surface water and improve your yard drainage in Oklahoma City.

  1. French Drain Systems

Perforated pipes are often the backbone of French drain systems. A French drain is a trench filled with gravel that uses a perforated pipe to collect and direct water. These systems are commonly used to prevent flooding in gardens, lawns, or near foundations.

  1. Agricultural Drainage

Farmers and agricultural workers use perforated pipes in drainage systems to keep fields dry and prevent excess water from damaging crops or eroding soil. It helps improve the quality of the soil and promotes healthier plant growth.

  1. Road Drainage

Perforated pipes are used under roads and highways to manage water runoff and prevent flooding on the surface. These systems help maintain road safety and longevity by reducing water-related damage.


Types of Perforated Drainage Pipes

While the general concept of perforated pipes remains the same, there are different types available to suit various drainage needs:

  1. Corrugated Pipes: These flexible pipes are often used in residential and landscaping drainage systems. They are lightweight, easy to install, and can bend around obstacles. 
  2. PVC Pipes: These are rigid pipes made from durable plastic. They are commonly used in areas where the pipe needs to be more resistant to pressure or where the soil conditions require a more robust pipe. 
  3. Slotted Pipes: These pipes have elongated slots instead of round perforations. Slotted pipes are ideal for specific drainage needs where a higher rate of water intake is required. 
  4. Dual-Wall Pipes: These pipes feature two layers, with the outer layer providing extra protection against soil pressure and the inner layer allowing for effective water flow.

Maintaining Perforated Drainage Pipes

To ensure that your perforated drainage pipes continue working effectively, it’s essential to maintain them regularly. Here’s how:

  1. Inspect the Pipes: Look for signs of clogs, such as standing water around the drainage area or poor water flow. Check for debris buildup around the perforations. 
  2. Clean the System: Use a hose or pressure washer to flush out debris that may have accumulated inside the pipe. 
  3. Clear Blockages: If you suspect that the pipe is clogged, you can use a plumbing snake or a specialized pipe cleaner to clear out any blockages.

Perforated drainage pipes are an effective, reliable, and affordable solution for managing excess water around homes, yards, and agricultural lands. Their design allows water to flow efficiently while keeping debris out, and they are essential for protecting foundations, preventing erosion, and keeping landscapes healthy.

Ready to protect your property with professional drainage systems? Contact Bill’s Custom Concrete, your go-to concrete contractor in Oklahoma City, OK at 405-755-3975!

Read More
Choose the Best Driveway Topping for Your Home

How to Choose the Best Driveway Topping for Your Home

At Bill’s Custom Concrete, we understand how important it is to maintain a beautiful, durable driveway. Your driveway is one of the first things people notice when they visit your home, and it’s also one of the most used areas of your property. Whether you’re dealing with an old, worn-out driveway or you simply want to improve its appearance, choosing the right driveway topping is key to getting the results you want.

As a leading concrete contractor in OKC, we’re skilled in providing high-quality concrete solutions that will not only enhance the look of your driveway but also ensure it stands the test of time. From concrete overlays to stamped concrete designs, we offer a variety of options to match your style and budget.

In this guide, we’ll walk you through the process of choosing the best driveway topping for your home. We’ll explain the different options available and help you understand how to make the right choice based on your needs, budget, and preferences. Let’s get started!

What is Driveway Topping?

Driveway topping is a process where a new layer of material is applied over your existing driveway. It helps cover up cracks, stains, and other damage while giving your driveway a fresh, clean look. It’s also an affordable option compared to completely replacing your driveway.

There are several types of materials used for driveway topping, each offering different benefits. Depending on your needs, one option may be better for you than another. Let’s take a closer look at the most common driveway topping choices.

1. Concrete Driveway Topping

Concrete toppings are one of the most popular options for homeowners looking to refresh their driveways. This topping involves applying a thin layer of new concrete over your existing surface. Concrete can be easily customized with textures, patterns, and even colors to give your driveway a unique look.

Why Choose Concrete Topping?

  • Durability: Concrete is strong and can withstand heavy traffic, making it a great option for driveways.
  • Aesthetic Flexibility: Concrete can be stamped or textured to resemble brick, stone, or even wood. It can also be colored to match the style of your home.
  • Low Maintenance: Concrete requires minimal maintenance. Regular cleaning and resealing every few years are usually all that’s needed to keep it in great condition.
  • Cost-Effective: Concrete toppings are often less expensive than completely replacing a driveway.

If you like the idea of a driveway that looks stylish and is easy to maintain, concrete topping could be the right choice for you.

2. Asphalt Driveway Topping

Asphalt is another common material used for driveway topping. It involves applying a new layer of asphalt over an old asphalt driveway to restore its look and function. Asphalt driveways are known for being smooth, durable, and quick to install.


Why Choose Asphalt Topping?

  • Quick Installation: Asphalt driveways can be installed relatively quickly, which means you can start using your driveway sooner.
  • Affordable: Asphalt is often less expensive than concrete, making it a good option if you’re on a budget.
  • Smooth Surface: Asphalt provides a smooth, even surface that is easy to drive on.
  • Flexible: Asphalt can expand and contract with temperature changes, making it less likely to crack compared to concrete.

If you’re looking for a driveway topping that is quick, affordable, and functional, asphalt might be the best option for you.

3. Gravel Driveway Topping

Gravel is one of the oldest and most traditional options for driveway topping. It involves adding a layer of loose gravel on top of the existing driveway. Gravel is available in a variety of colors and sizes, giving homeowners the opportunity to choose a look that matches their property.


Why Choose Gravel Topping?

  • Affordable: Gravel is one of the least expensive materials available for driveway topping.
  • Easy to Install: Gravel can be installed quickly and doesn’t require a lot of preparation.
  • Natural Look: If you want a more rustic or natural look, gravel is a great option.
  • Drainage: Gravel allows water to drain easily, which can help prevent puddles and reduce the risk of cracks.

While gravel is inexpensive and functional, it does have some downsides. Gravel driveways may need to be replenished over time, as the material can shift or wash away. Additionally, the surface can become uneven, which may require some maintenance.

4. Paver Driveway Topping

Paver driveways are made from individual paving stones or bricks, which are arranged in a pattern to create a solid surface. Pavers come in many colors and designs, giving you the freedom to create a custom look for your driveway.


Why Choose Paver Topping?

  • Customizable Appearance: Pavers offer endless design possibilities. You can choose from a wide variety of colors, patterns, and shapes to create a driveway that complements your home.
  • Durable and Strong: Pavers are strong and can withstand heavy vehicles without cracking.
  • Easy to Repair: If a paver becomes damaged, you can simply replace it without needing to replace the entire driveway.
  • Good Drainage: Paver driveways allow water to flow between the stones, helping to prevent puddles and reduce the risk of flooding.

Pavers are a great choice for homeowners who want a highly customizable and long-lasting driveway that’s also easy to maintain.

5. Epoxy Coating Driveway Topping

Epoxy coating involves applying a layer of epoxy resin over the surface of your driveway. This creates a smooth, shiny finish that’s resistant to stains, chemicals, and other damage.

Why Choose Epoxy Topping?

  • Durable and Resistant: Epoxy is highly resistant to stains, oil spills, and other substances that can damage your driveway.
  • Shiny, Clean Finish: Epoxy gives your driveway a glossy, attractive finish that looks fresh and modern.
  • Low Maintenance: Epoxy driveways are easy to clean and maintain. Simply wash away dirt and debris to keep the surface looking great.

While epoxy coatings can be a great choice for homeowners looking for a sleek, modern look, they can be more expensive than other topping options. They also require proper application to ensure a smooth, long-lasting finish.

How to Choose the Best Driveway Topping for Your Home

A curved concrete pathway is surrounded by vibrant green grass.

Now that you know more about the different types of driveway toppings, how do you choose the best one for your home? Here are a few factors to consider when making your decision:

1. Budget

Your budget is one of the most important factors in choosing a driveway topping. Some materials, like concrete and asphalt, are relatively affordable, while others, like pavers or epoxy coatings, can be more expensive. Make sure to choose an option that fits within your budget while still meeting your needs.

2. Climate

The climate in your area can also impact your choice of driveway topping. For example, if you live in an area with extreme temperatures, concrete and asphalt may crack over time, especially if not maintained properly. On the other hand, gravel allows for better drainage and may perform better in wet or freezing conditions.

3. Aesthetic Preferences

Consider the overall look of your home and the style you want for your driveway. If you’re looking for something classic and timeless, concrete or asphalt might be the best choice. For a more natural or rustic appearance, gravel could be the way to go. If you want something highly customizable with various design options, pavers might be the right fit.

4. Maintenance

Different driveway toppings require different levels of maintenance. Concrete and asphalt driveways may need occasional resealing, while gravel may need to be replenished every few years. Epoxy coatings and pavers can require minimal maintenance, but may need occasional repairs. Make sure to choose an option that you’re comfortable maintaining over time.

5. Durability

Think about how much traffic your driveway gets and how long you want the topping to last. Some materials, like concrete and asphalt, are known for their durability and can last for many years. Pavers, if installed correctly, can also be very durable. Gravel, while affordable, may need more upkeep to maintain its appearance and function.

Summary

Choosing the right driveway topping for your home is an important decision that can impact both the appearance and functionality of your driveway. Whether you prefer the look of concrete, asphalt, gravel, pavers, or epoxy, there’s an option that will meet your needs and fit your budget. At Bill’s Custom Concrete, we’re happy to help guide you through the process and ensure that you choose the best solution for your home.

If you’re ready to get started on your driveway-topping project in Oklahoma City, give us a call at 405-755-3975 today! We’ll help you choose the perfect option and ensure a smooth installation.

Read More
Stamped Concrete Without Colors

Can You Get Stamped Concrete Without Color?

Stamped concrete is a popular choice for homeowners and businesses who want to enhance the look of their outdoor and indoor surfaces. It offers a variety of textures and patterns that mimic natural materials like stone, brick, and wood. Many people are familiar with the colorful options that come with stamped concrete, but the question often arises: can you get stamped concrete without color?

The short answer is yes, you can definitely get stamped concrete without color. But to fully understand this, let’s break down how stamped concrete works, how color is added, and what it means to have unstained or naturally stamped concrete.

What is Stamped Concrete?

Before we dive deeper, it’s important to understand what stamped concrete is. Stamped concrete is simply concrete that has been textured or patterned to resemble other materials, such as bricks, stones, tiles, or even wood planks. The process involves pouring a base layer of concrete and then using special stamping mats to press patterns into the surface while the concrete is still wet.

The beauty of stamped concrete lies in its ability to mimic the look of more expensive materials at a much lower cost. You can achieve the look of a high-end material, but with the durability and flexibility that concrete offers.

Can Stamped Concrete Be Done Without Color?

Yes, stamped concrete can be done without color. While color is a common option, it is not a requirement for creating stamped concrete. The concrete itself can be left in its natural gray color, and you can still use stamps to create the desired texture or pattern.


Here’s how it works:

  1. Base Color of Concrete: Concrete, by default, comes in a natural gray color, which is the color of the cement mix. When you choose to skip adding color, the concrete will remain in this neutral shade. 
  2. Stamping Process: The stamping process remains the same whether you decide to use color or not. After pouring the concrete, a stamping mat or mold is applied to the surface to imprint the design or texture. This gives the surface a patterned appearance, but without altering the base color of the concrete. 
  3. Surface Finish: Even without color, stamped concrete can still be finished with a variety of techniques such as smooth, textured, or glossy finishes. Some people may choose a matte or satin finish, which enhances the natural gray tone of the concrete while highlighting the texture.

Why Choose Stamped Concrete Without Color?

There are a number of reasons why someone might choose to go with unstained or natural-colored stamped concrete. Let’s take a look at some of the key benefits:

  1. Cost-Effective: Adding color to concrete can increase the cost of the project. If you’re on a budget and still want the textured, patterned look of stamped concrete, skipping the color can help keep your costs down. You can still enjoy the benefits of stamped concrete without paying extra for color additives. 
  2. Natural Look: Some people prefer the clean, neutral, and understated look of natural gray concrete. It blends well with almost any outdoor or indoor space and doesn’t overpower other design elements. For instance, if you have a lot of colorful plants or furniture, natural-colored concrete can provide a simple and elegant backdrop without clashing with the rest of the decor. 
  3. Durability: The color added to concrete is typically applied to the surface, which can wear off over time due to weather exposure, foot traffic, or heavy equipment. By leaving the concrete color natural, there’s less concern about the color fading or chipping away. This can be especially beneficial for high-traffic areas where the surface is more likely to experience wear and tear. 
  4. Versatility: Natural gray concrete works with many types of patterns, textures, and surroundings. Whether you’re creating a rustic stone patio, a modern walkway, or a stylish driveway, the neutral gray color can complement almost any design. Stamped concrete, with or without color, can be used for a variety of outdoor and indoor spaces such as patios, driveways, pool decks, sidewalks, and even flooring inside the house. 
  5. Less Maintenance: Colored stamped concrete may require occasional cleaning and maintenance to keep its color vibrant. Natural gray stamped concrete requires less upkeep since you don’t have to worry about fading or the need for touch-ups on the color. Regular cleaning and resealing are generally sufficient to maintain the look and functionality of the surface.

Is Stamped Concrete Without Color Less Attractive?

The answer is no. While color certainly adds to the overall aesthetic of stamped concrete, it doesn’t mean that unstained concrete is less appealing. In fact, many people love the subtle, elegant look of natural gray concrete. It allows the texture and pattern to take center stage without being overshadowed by bright or bold colors.

When done properly, the texture and pattern of the stamped concrete will stand out, even without the added color. The beauty lies in the shape and feel of the surface. For example, a stamped concrete driveway or patio designed to look like flagstone or cobblestones can still look beautiful in natural gray, with intricate patterns and textures giving it a visually interesting and professional appearance.

How Can You Enhance Natural Stamped Concrete?

Close-up of a textured stone wall with irregular, interconnected brownish-grey stones.

Even without adding color, there are several ways to enhance the look of natural stamped concrete:

  1. Sealing: Sealing the surface is a common and important step in the stamped concrete process. A sealer not only protects the concrete from stains and damage but can also enhance the texture and shine of the surface. A glossy or satin finish can bring out the natural beauty of the concrete and give it a polished appearance. 
  2. Adding Texture: The stamping process itself adds texture to the concrete surface. This texture can be as subtle or as bold as you like, from a simple brushed finish to a deeply embossed stone or wood-like appearance. Even without color, these textures will create depth and interest in the surface. 
  3. Complementing Landscaping: If you have beautiful landscaping, flowers, shrubs, or other outdoor design elements, natural-colored stamped concrete can act as a perfect complement. The neutral tone of the concrete won’t compete with the bright colors of flowers or the vibrant hues of your home’s exterior. 
  4. Lighting: Proper lighting can make a huge difference in how your stamped concrete looks at night. Landscape lighting can highlight the textures and patterns, making your stamped concrete stand out even after the sun sets.

Conclusion

All in all, yes, you can get stamped concrete without color, and it can still be just as beautiful and functional as stamped concrete with color. By choosing natural gray concrete, you can achieve a sleek, simple, and timeless look that fits well with a variety of design styles. Additionally, skipping the color can help save costs, reduce maintenance, and avoid fading over time.

If you’re considering stamped concrete in Oklahoma City, OK, for your project and are unsure about whether to go with color or stick with natural concrete, feel free to reach out to Bill’s Custom Concrete for more information or advice. We’re here to help you make the best choice for your space! Call us at 405-751-3041!

Read More